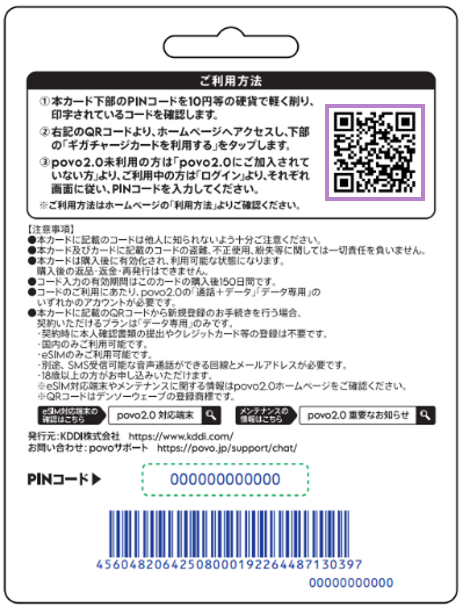
This card allows you to purchase povo Topping with cash.
povo can be easily used by customers who want to pay their daily communication costs in cash, as well as students and other customers who do not have a credit card.
Take the card to the cash register and tell the staff Topping you would like.
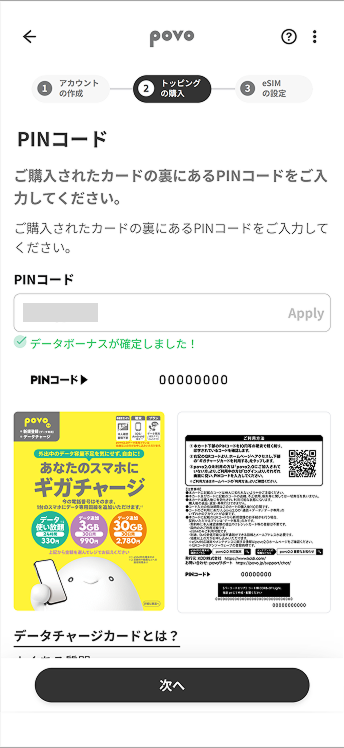
After payment, enter the redemption code on the Giga Charge Card to add more data.
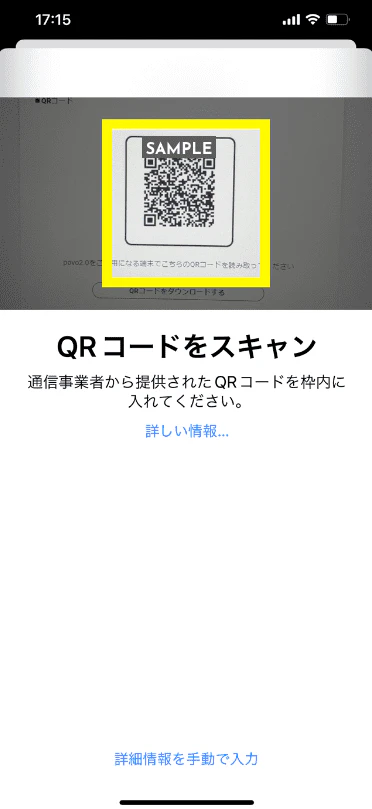
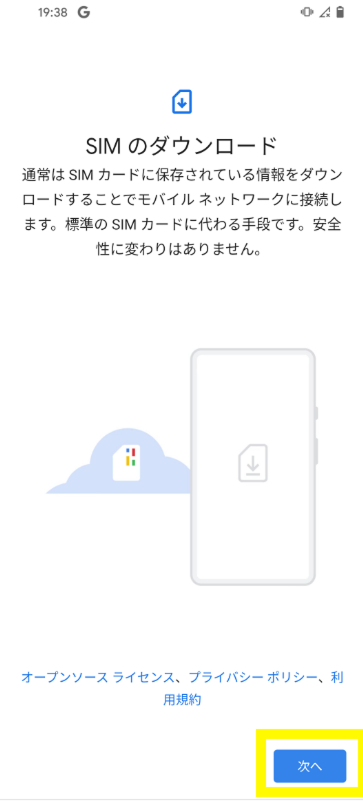
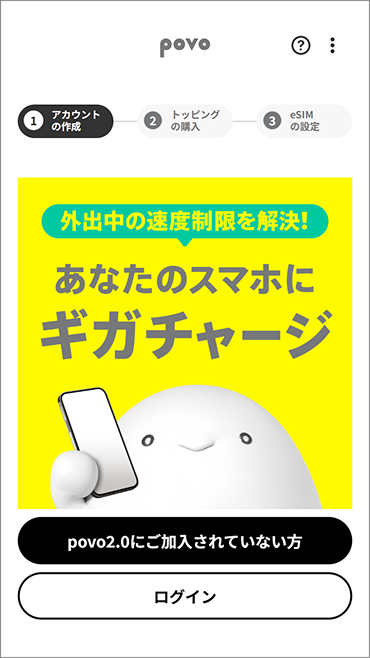
Customers who are not currently using povo can sign up in as little as three minutes by scanning the QR code *1 on the back of their Giga Charge Card.
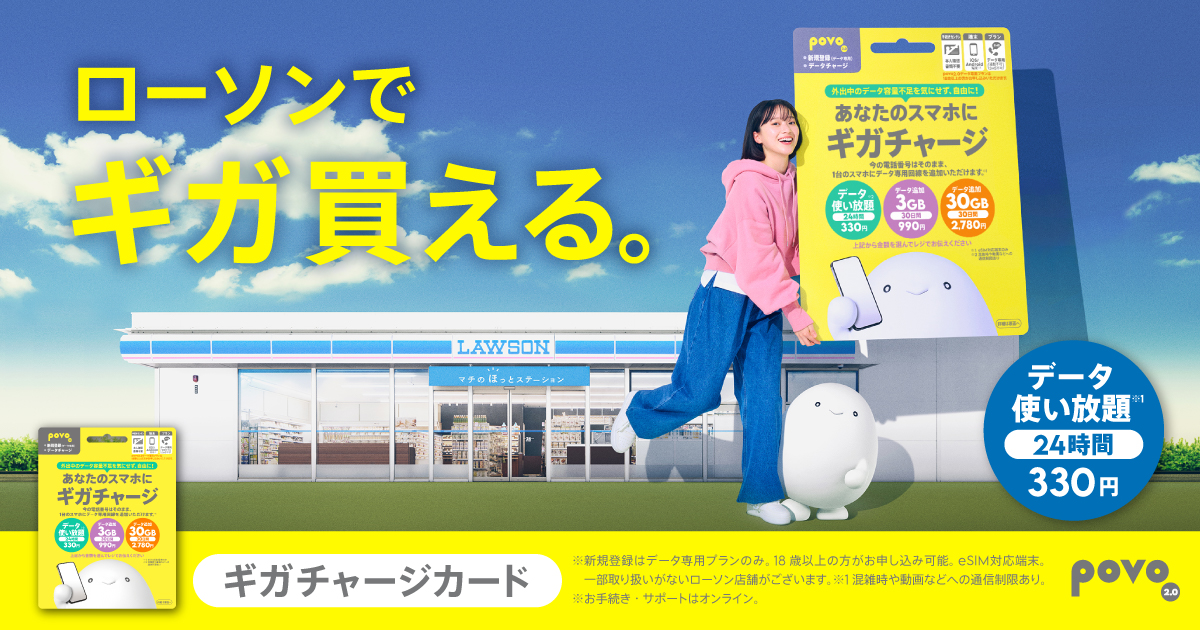
The card can be purchased at LAWSON stores nationwide *2.
*1: QR Code is a registered trademark of DENSO WAVE.
*2: Some stores may not carry this product.
The old card can still be purchased until (Mon) October 20, 2025.
You can use the card you purchased without any problems.
| Topping Name | Amount | Validity |
|---|---|---|
| データ使い放題(24時間)※3 | 330円 | 24 hours |
| データ追加3GB(30日間) | 990円 | 30日間 |
| データ追加30GB(30日間) | 2,780円 | 30日間 |
*3: Communication speeds may be limited during network congestion or when using video or cloud games.
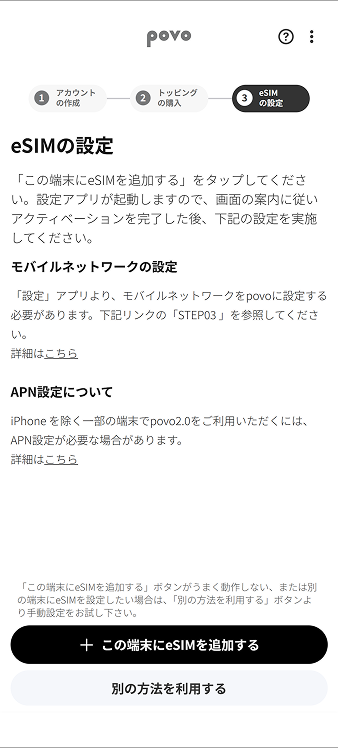
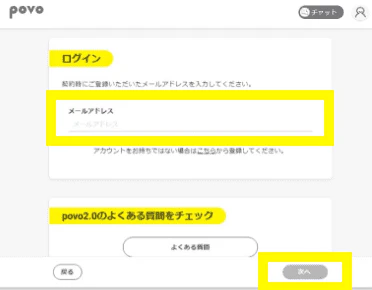
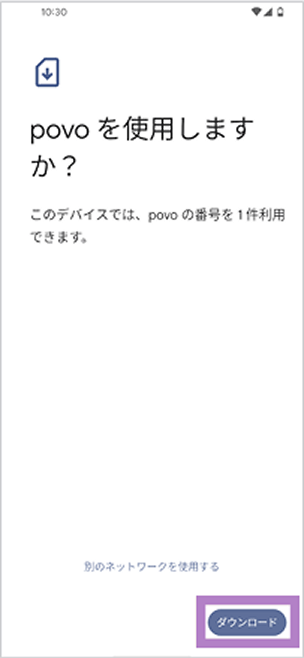
If you would like to add other Topping, you will need to download the app and register your payment method.
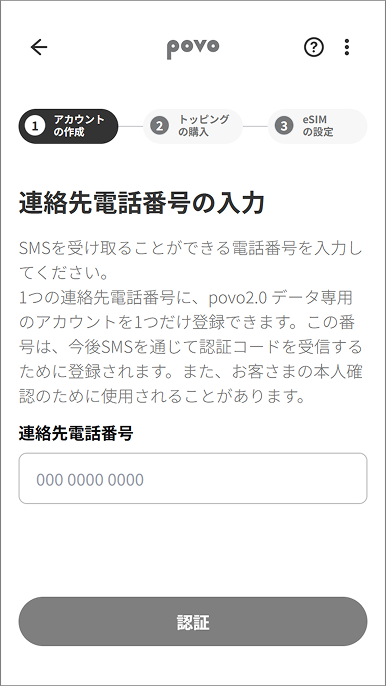
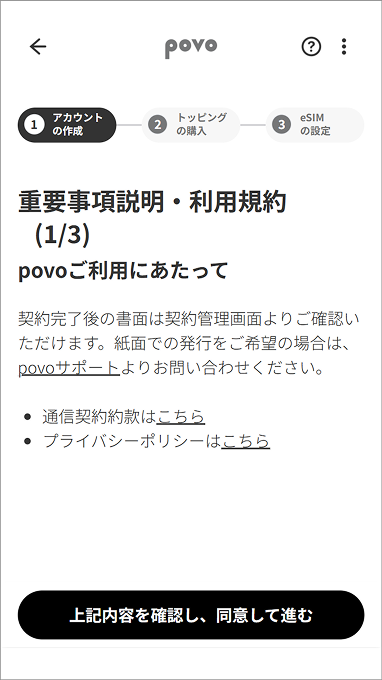
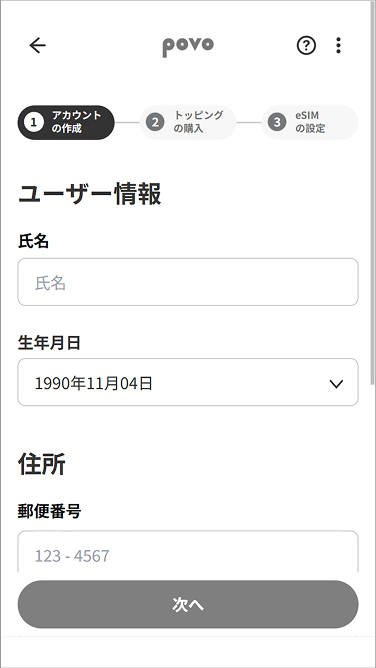
You will need to download the app to apply (new, switching from another company/ UQ mobile), purchase Topping, and check various details.
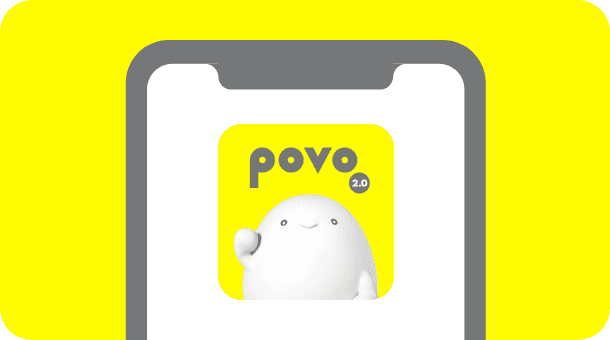
Download the app here


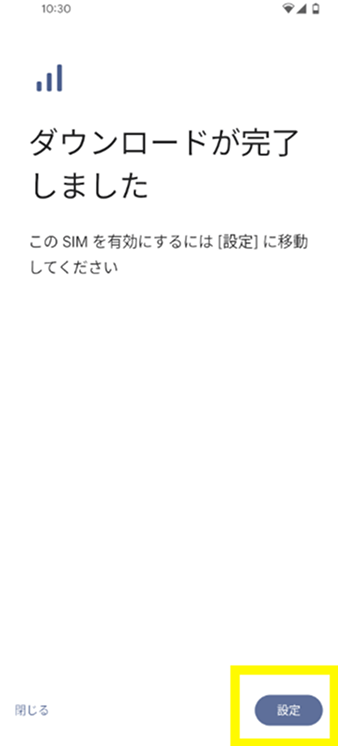
*This includes when purchasing a new card or checking remaining data capacity.


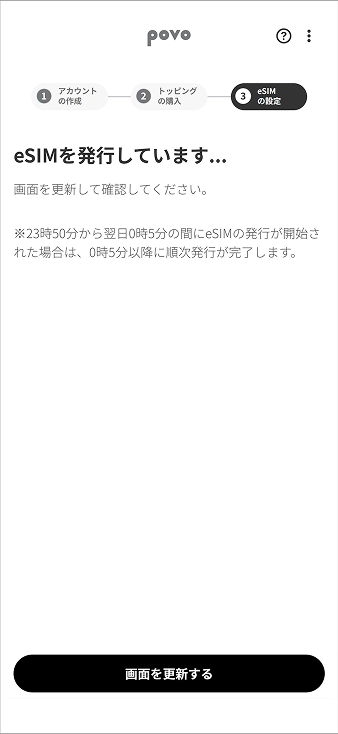

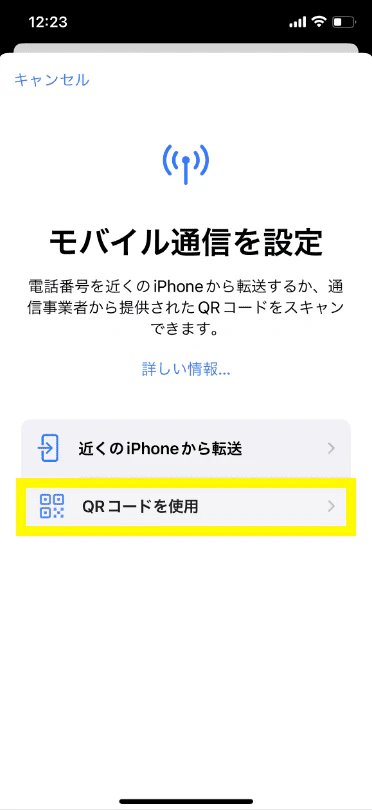
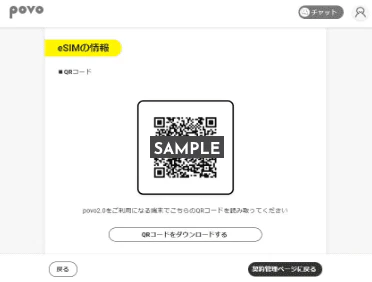
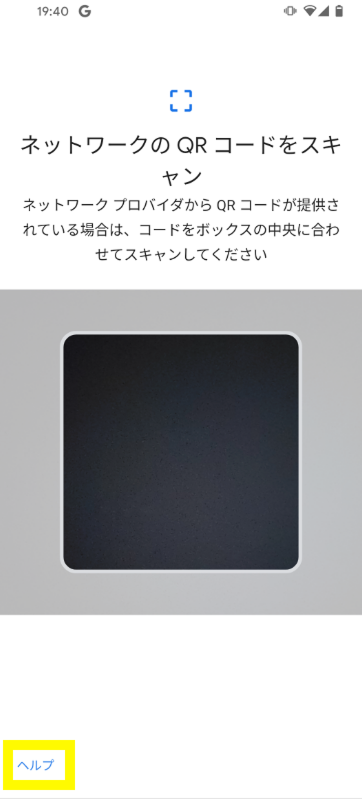
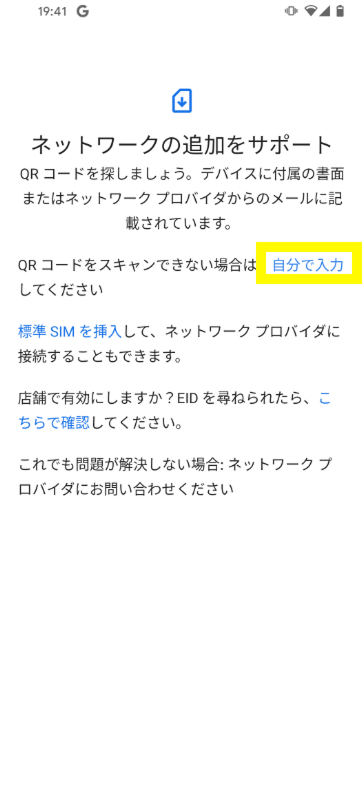
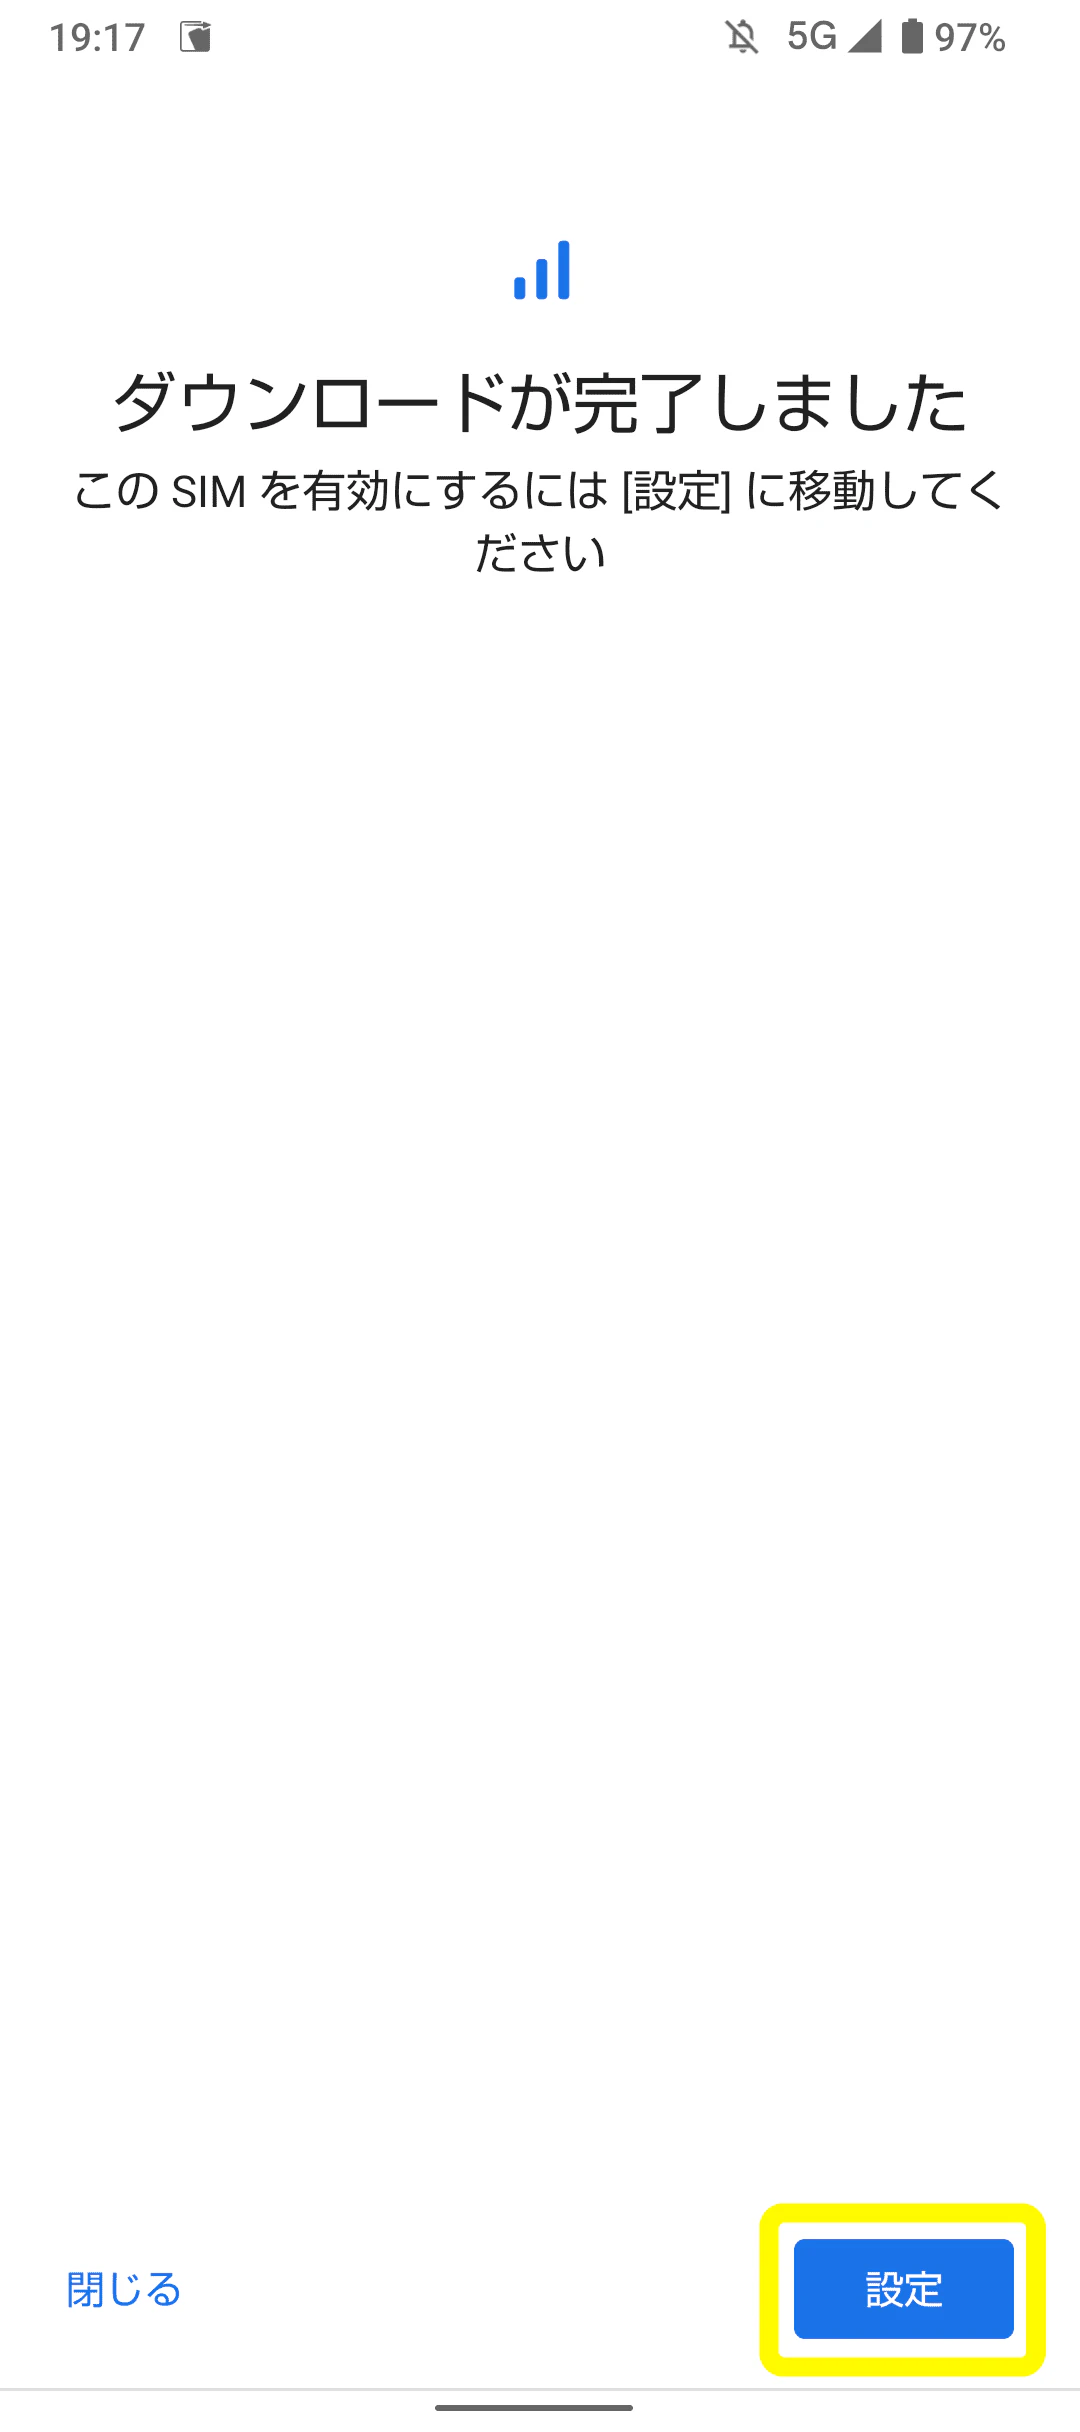
*If you are unable to use it or it does not work properly, please try the "Code Entry Method" below.
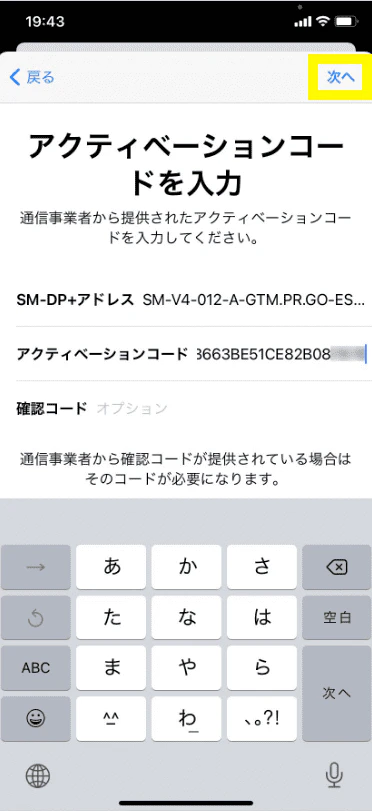
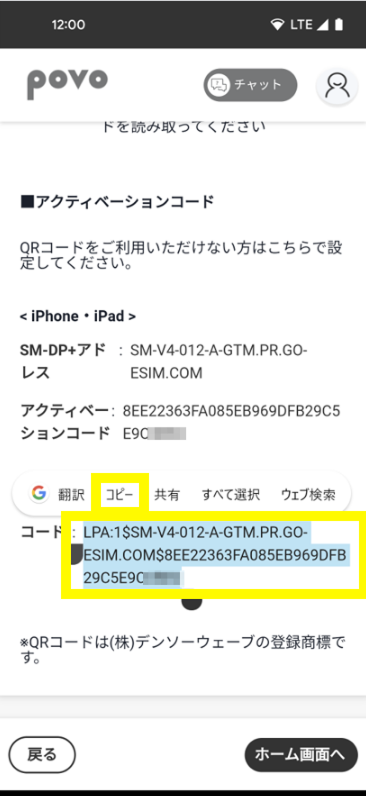
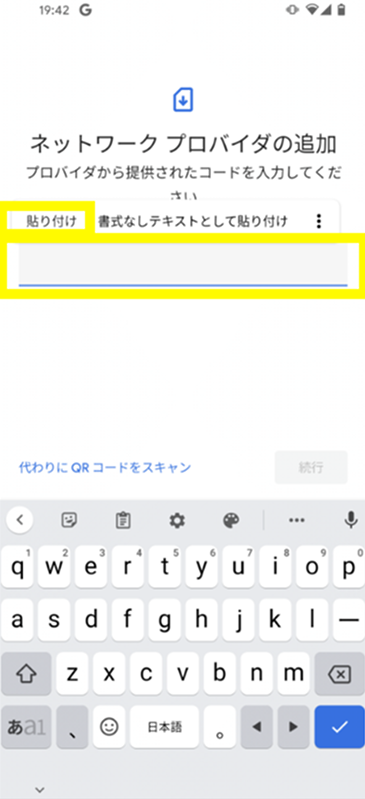
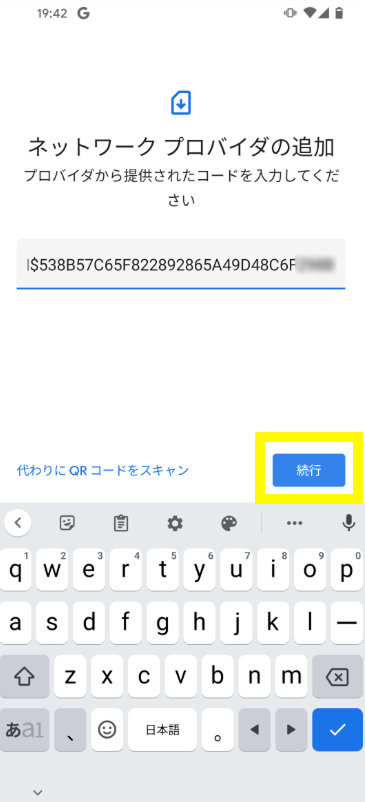
*In the case of code entry method

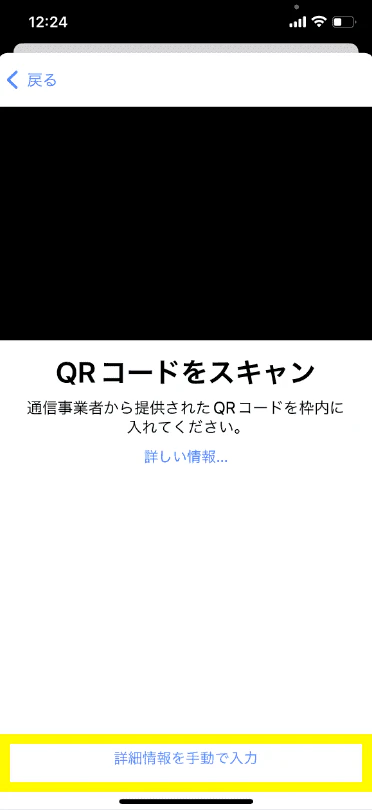
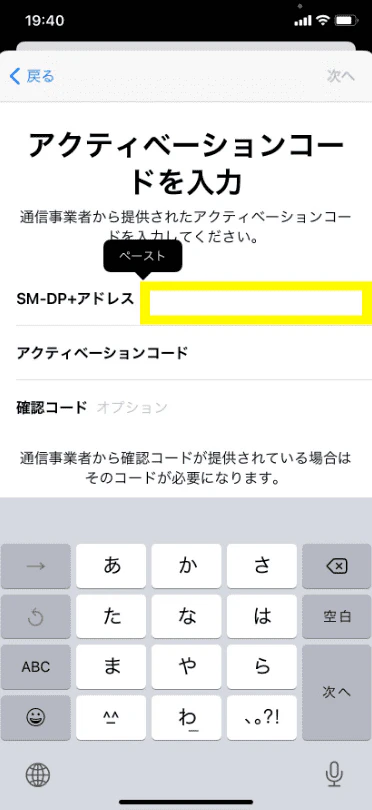
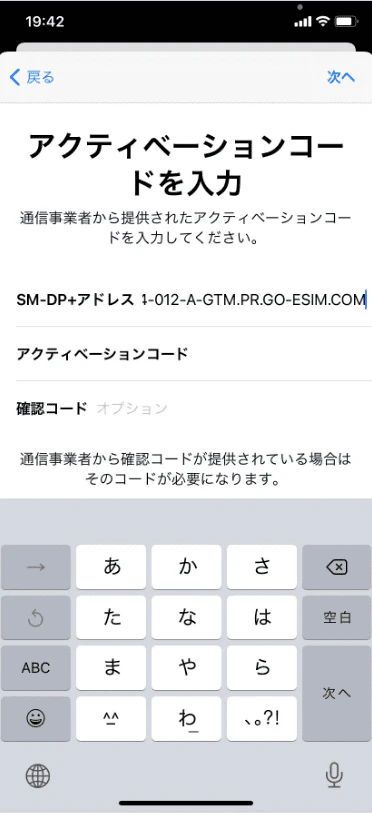
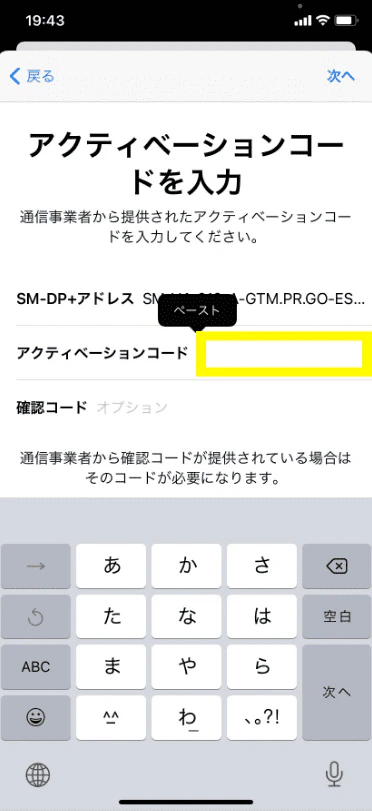

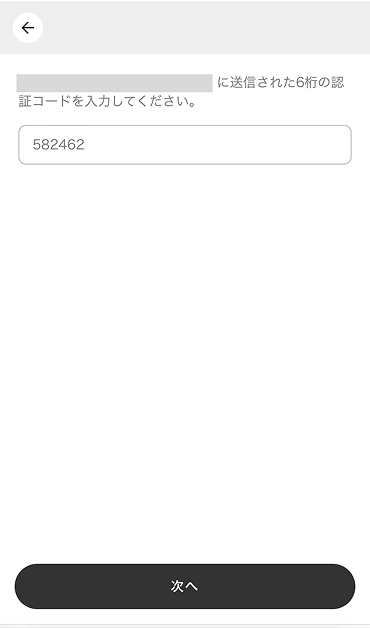
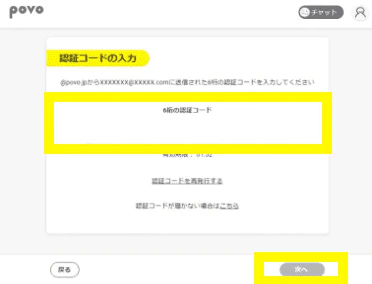
*There is no need to enter a "confirmation code."
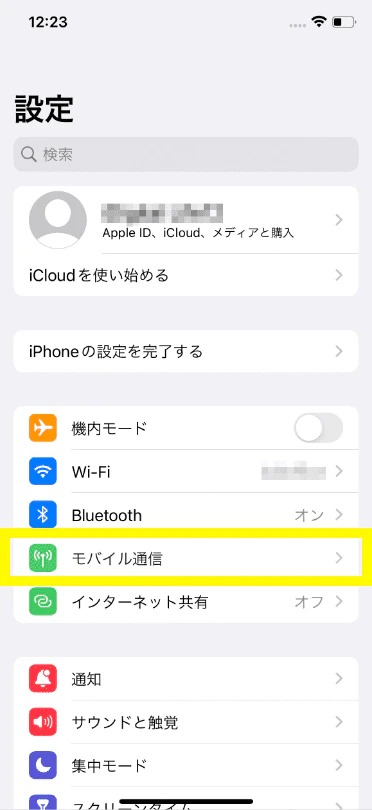
*For iPad, select Settings > Mobile Data > Add New Plan > Other... to go to the screen where you can select a mobile data plan.
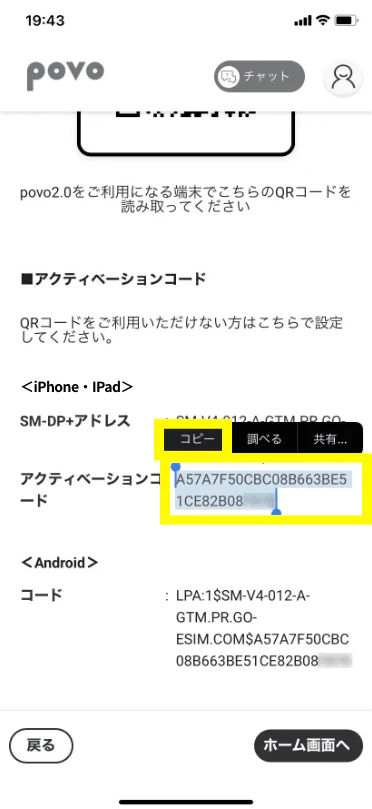
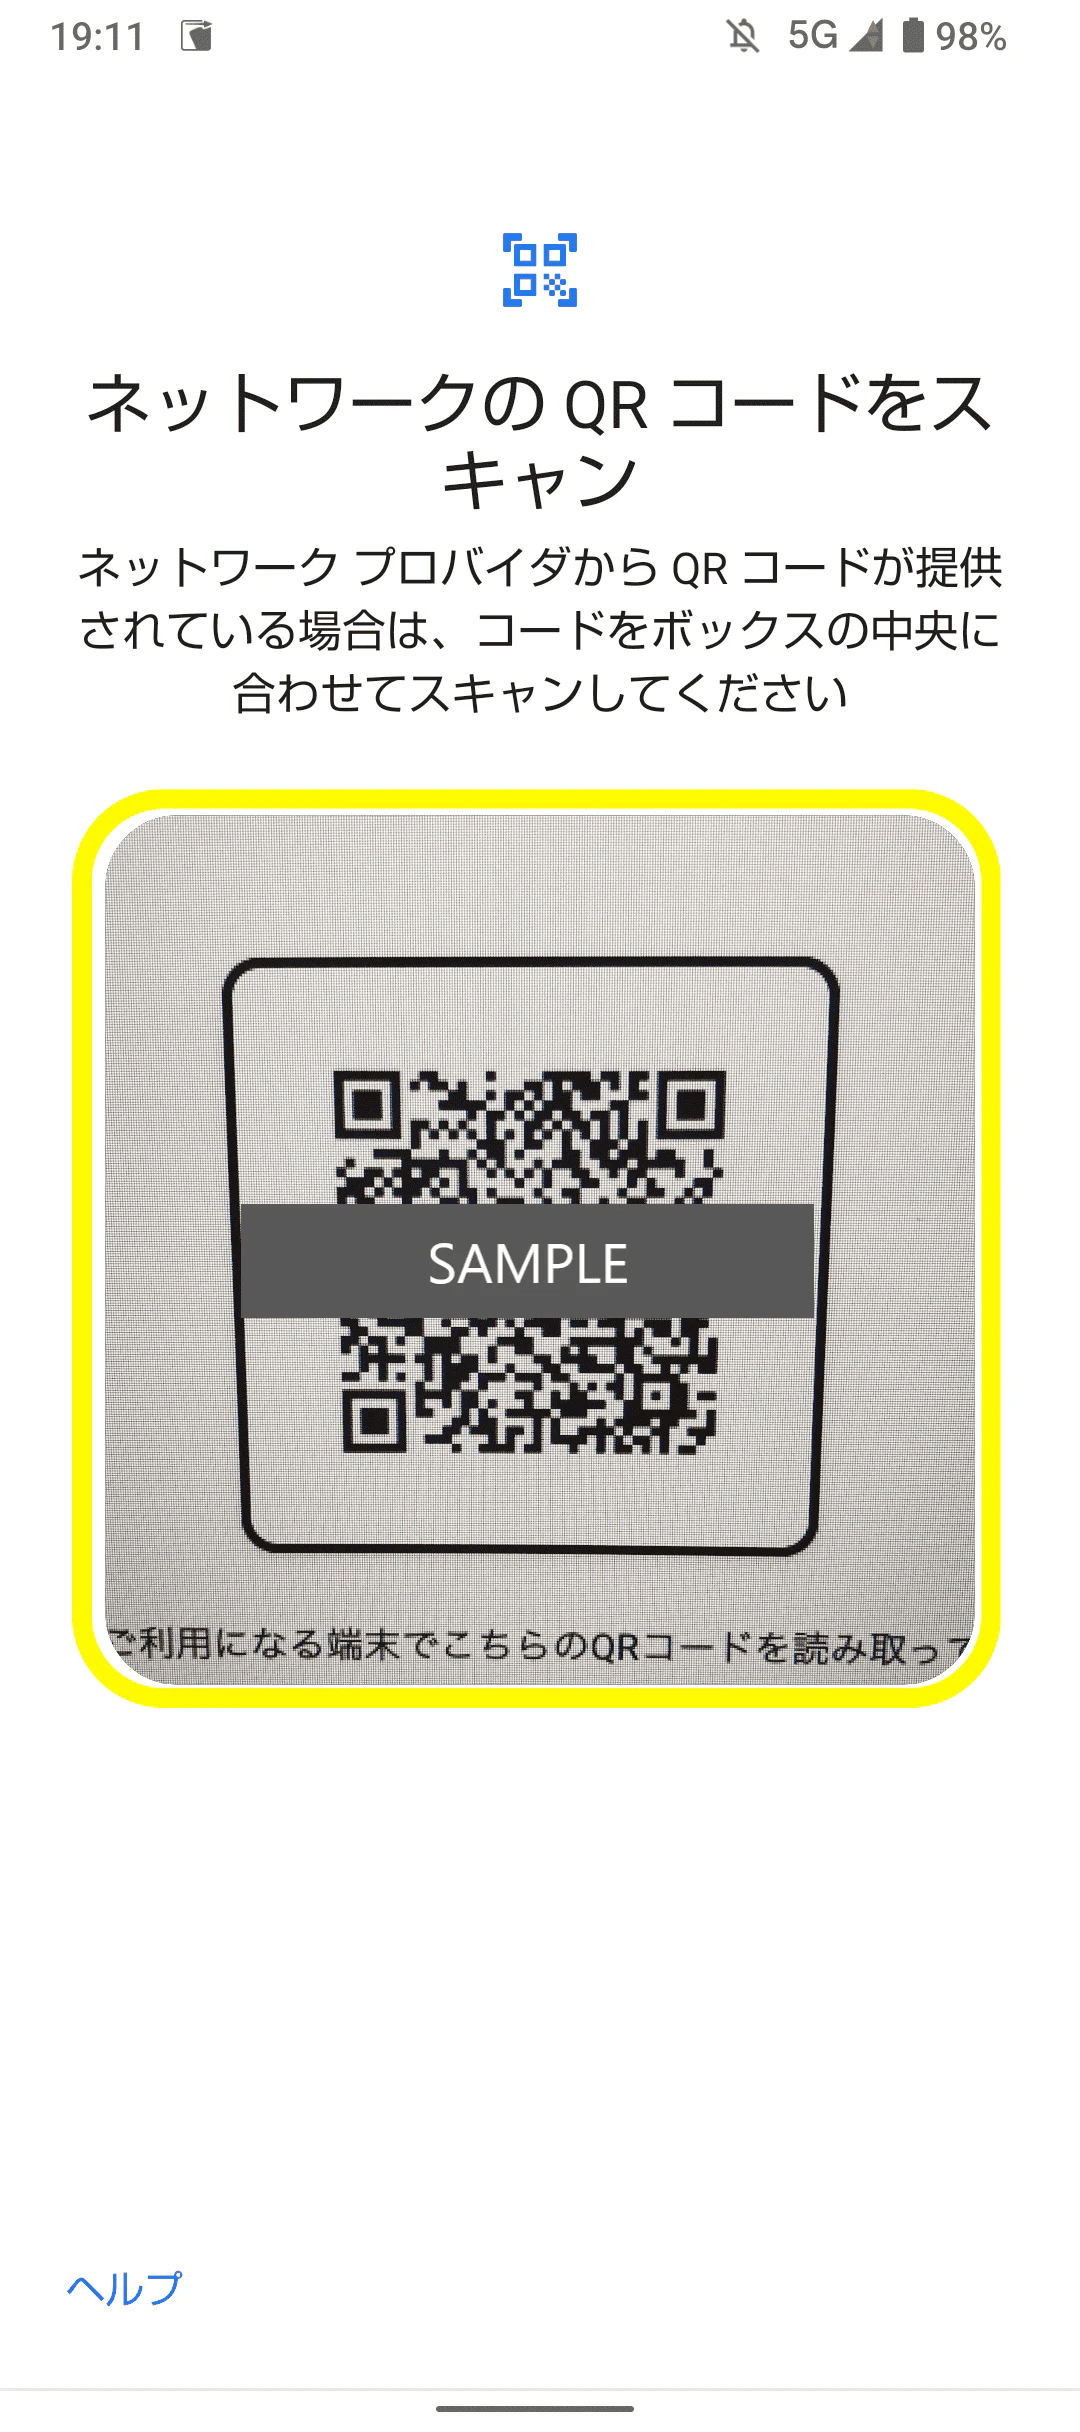
*If you are unable to complete the eSIM setup, it may be because the code was not copied properly. Please double-check that all alphanumeric characters have been copied and try again. If this still does not work, please try the "QR code method *1" below.
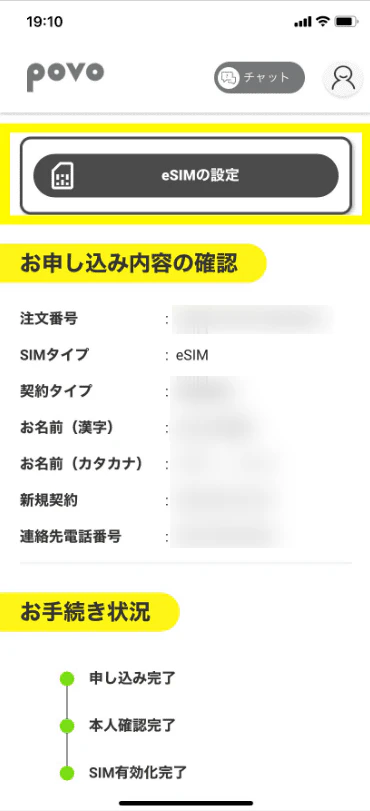
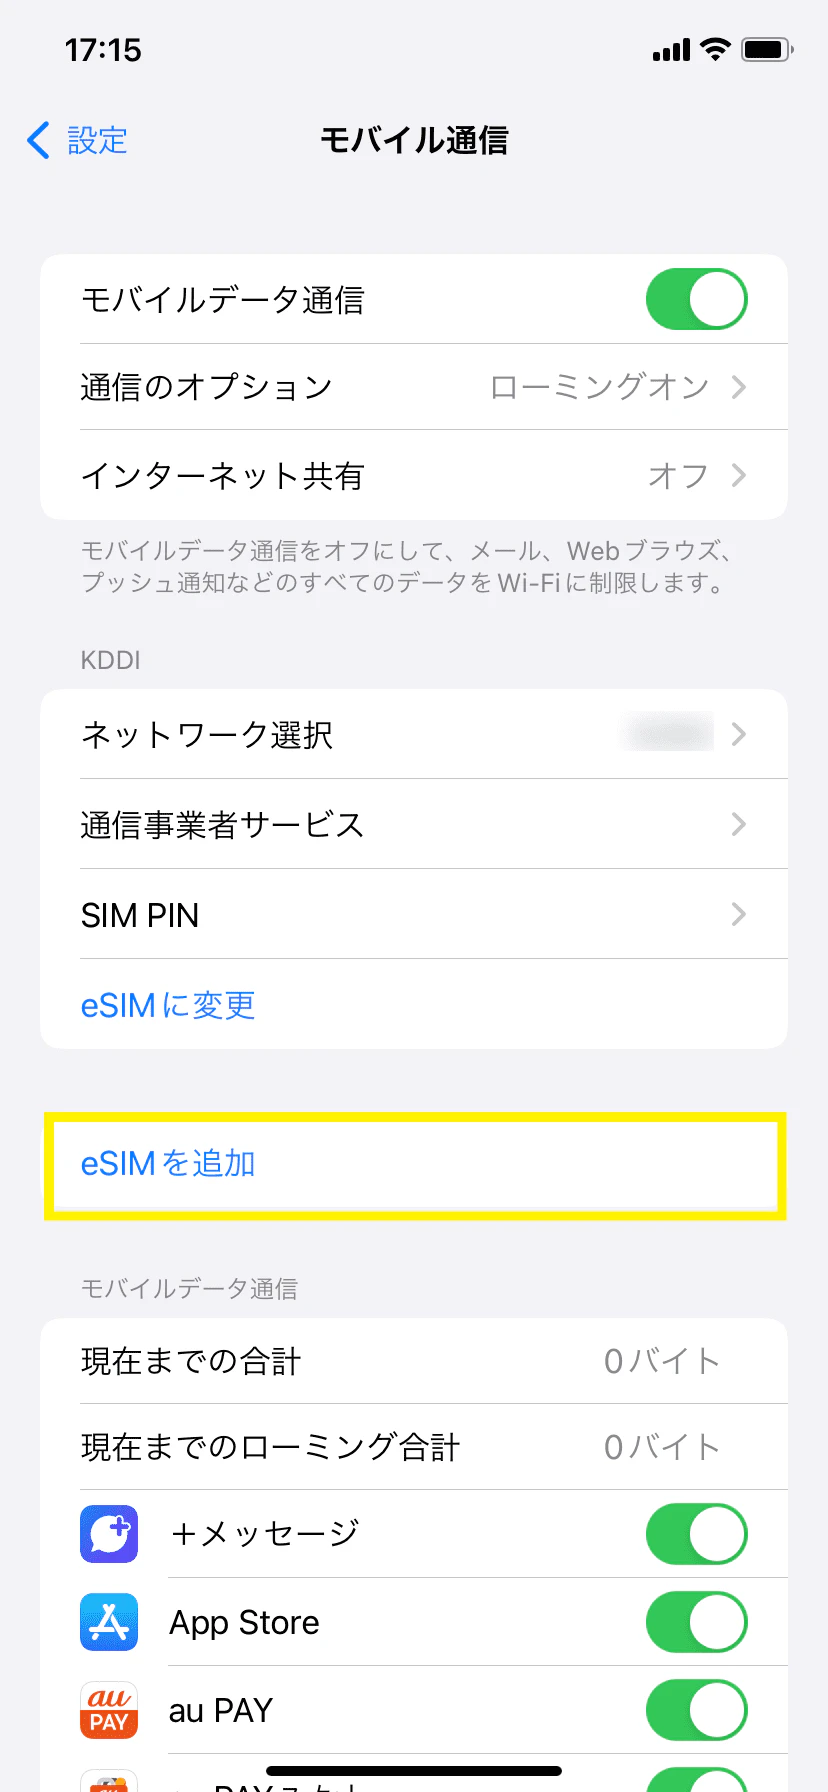
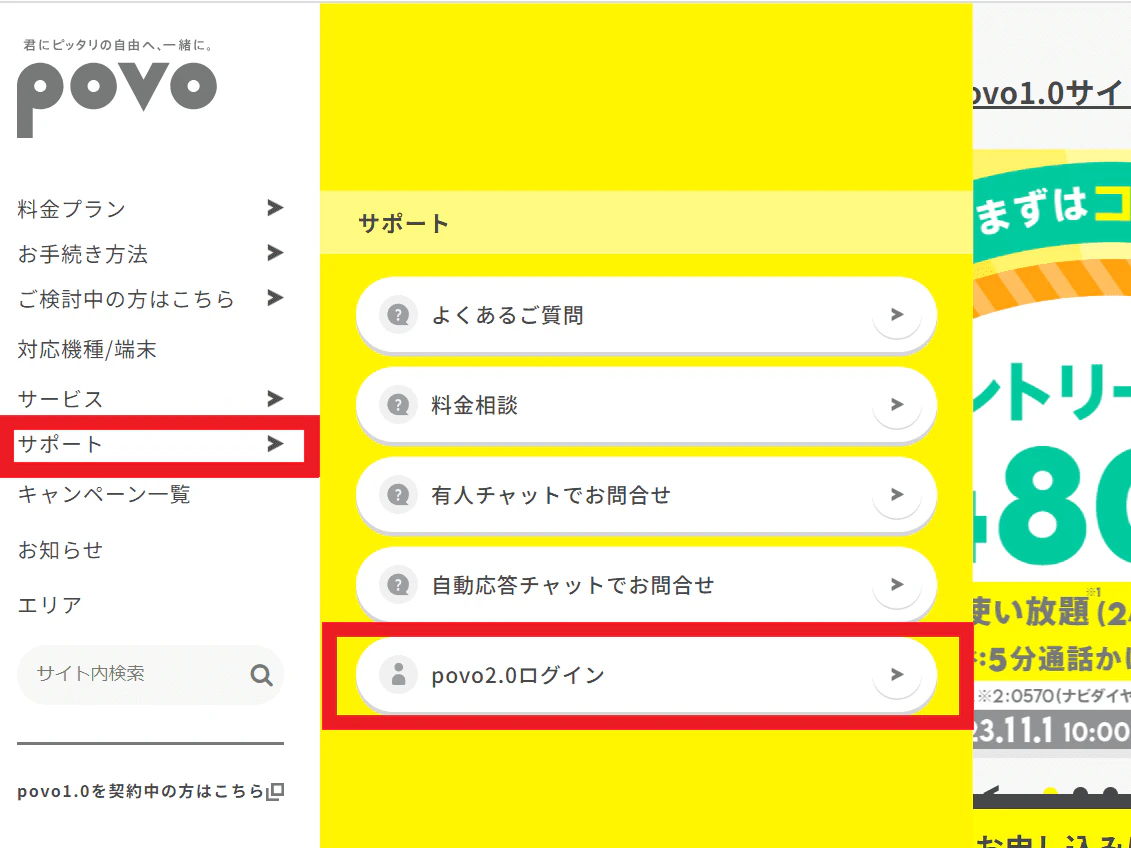
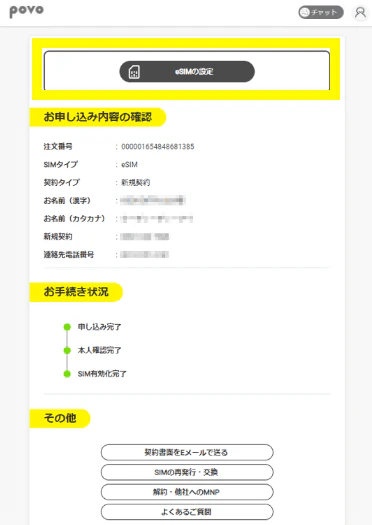
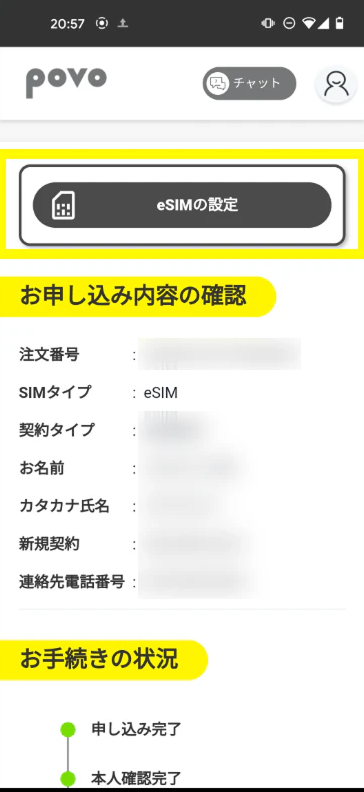
*To move to the STEP02-1 screen after going to the home screen once, go to the person icon in the upper left corner of the home screen > Contract Management.


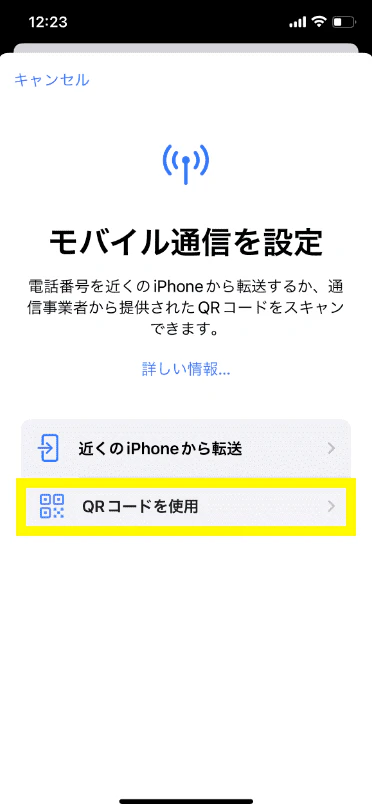

*For iPad, select Settings > Mobile Data > Add New Plan > Other... to go to the screen where you can select a mobile data plan.
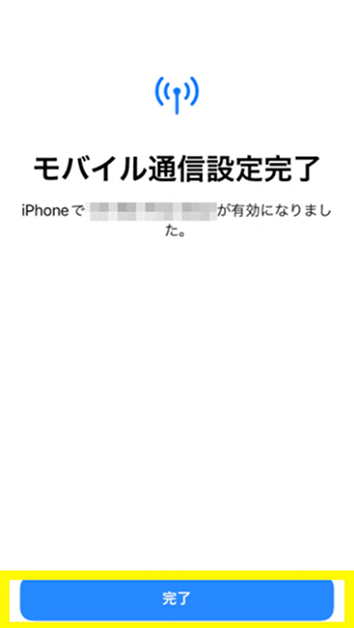
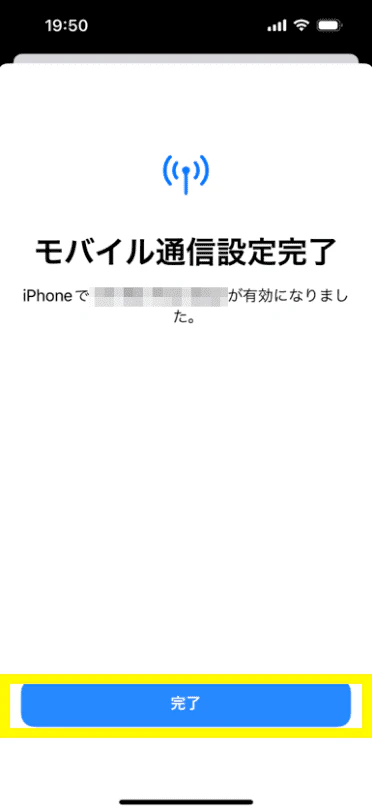
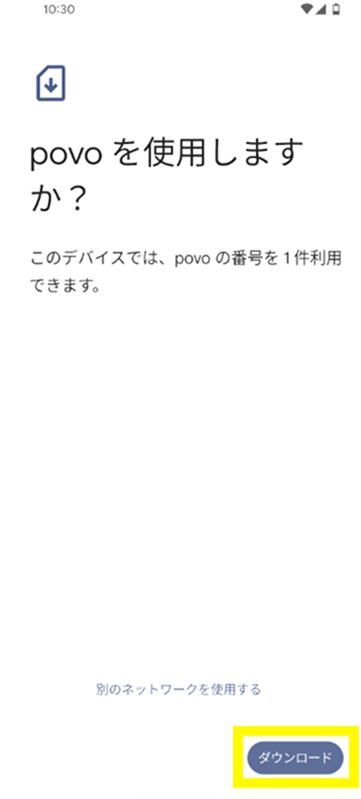
*Even if you are redirected to the home screen, please make sure to check the call test and mobile data communication test in STEP 05 before purchasing Topping.
*If you are unable to use it or it does not work properly, please try the "Code Entry Method" below.
*In the case of code entry method

*If you are unable to complete the eSIM setup, it may be because the code was not copied properly. Please double-check that all alphanumeric characters have been copied and try again. If this still does not work, please try the "QR code method *1" below.
*To move to the STEP02-1 screen after going to the home screen once, go to the person icon in the upper left corner of the home screen > Contract Management.
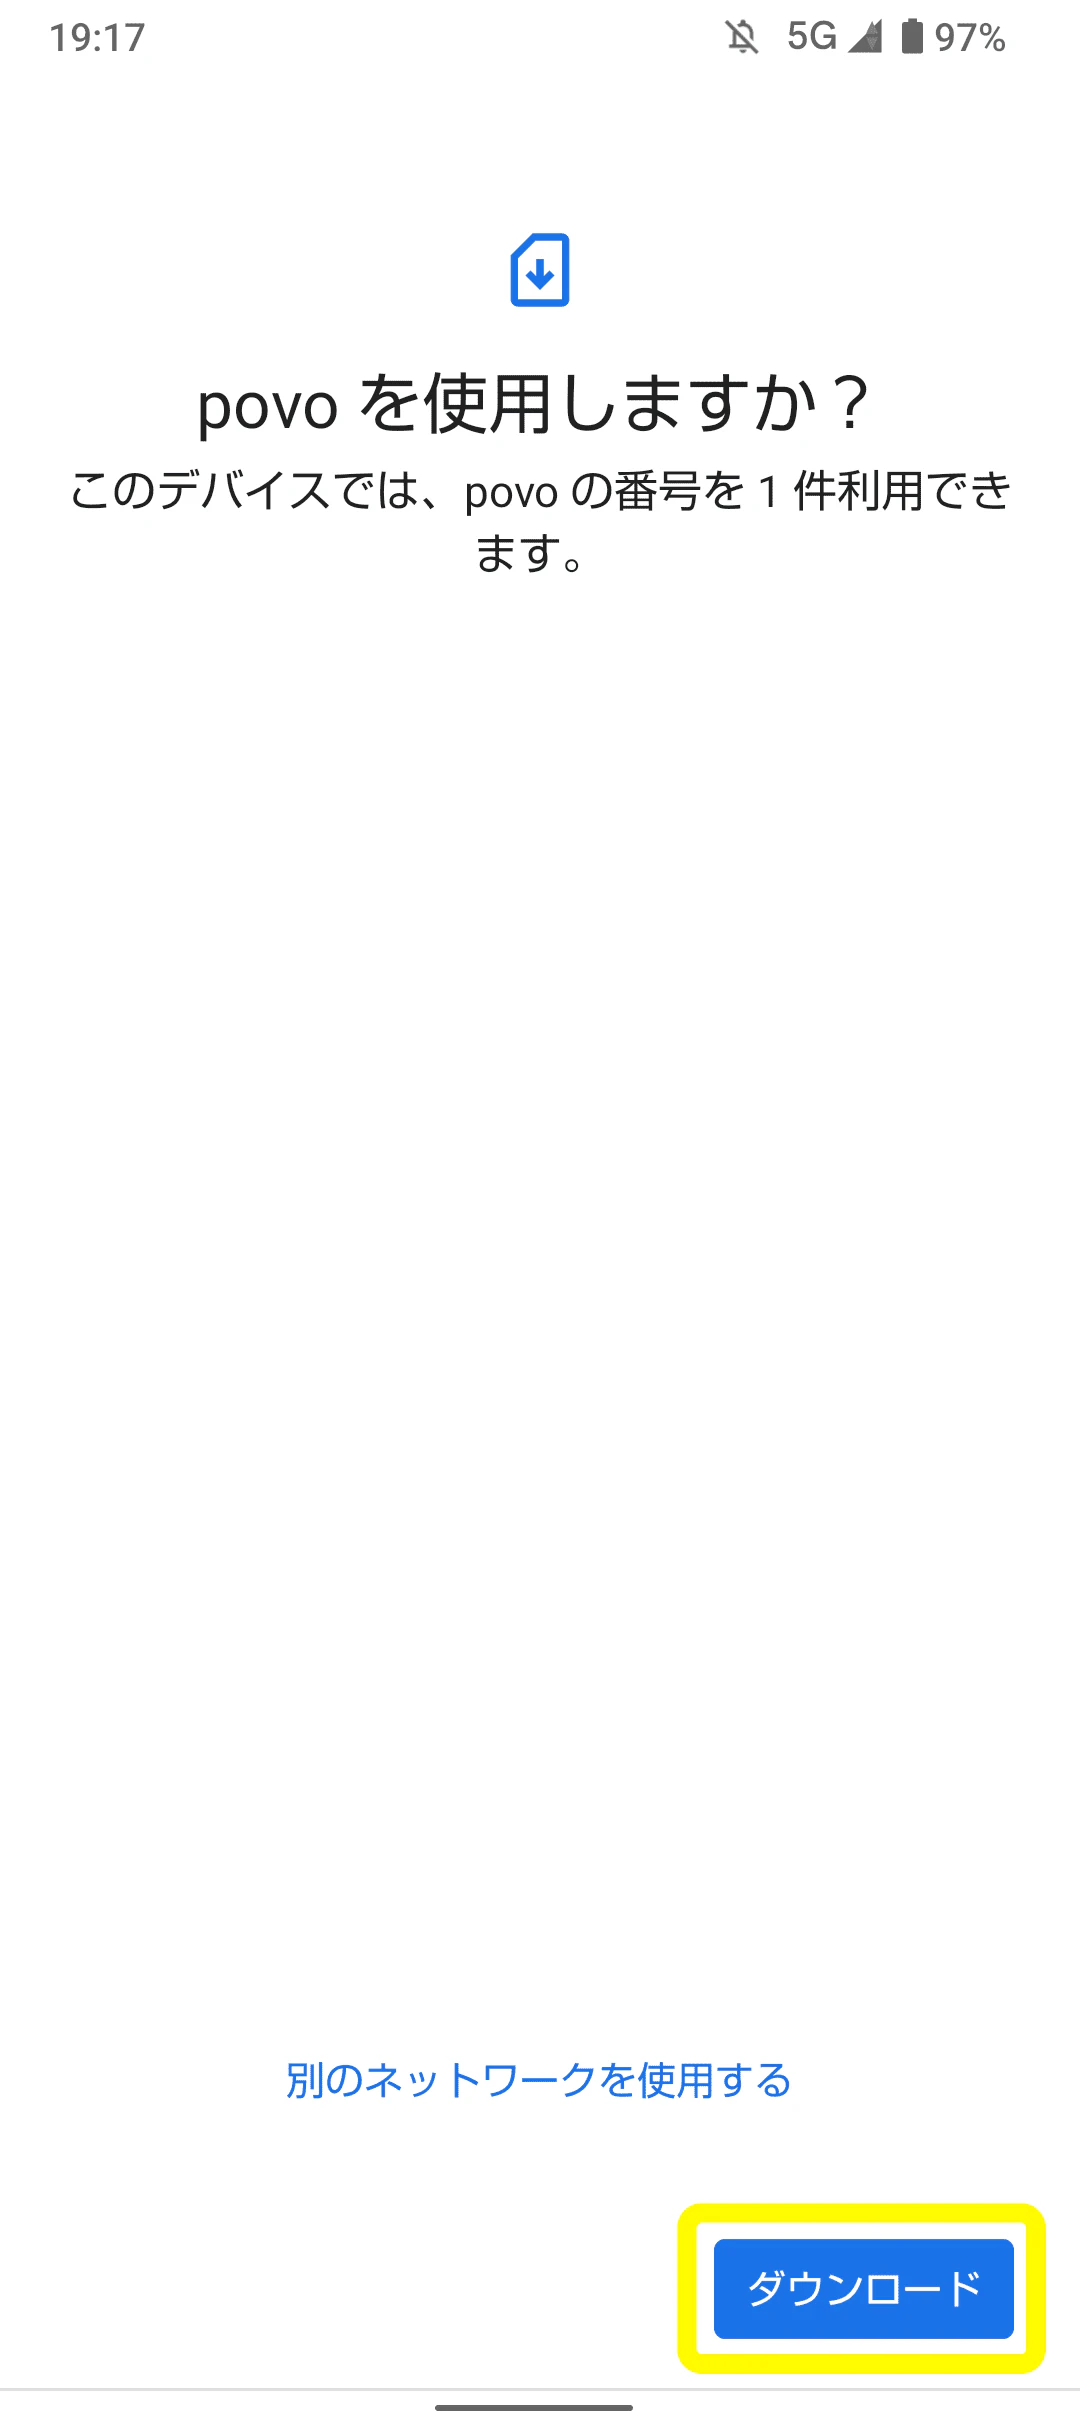
*Please purchase Topping only after checking the call test and mobile data communication test in STEP 05.
*This includes when purchasing a new card or checking remaining data capacity.

| convenience store |
|---|
| LAWSON (including Natural LAWSON) |
| LAWSON Store 100 |
●Please be careful not to let others know the code written on the card.
●We are not responsible for any theft, misuse, or loss of the card or the code printed on the card.
●The card will be activated and ready for use after purchase. Returns, refunds and reissues are not possible after purchase.
●The code entry is validity for 150 days after purchasing the card.
●To use the code, you will need a povo2.0 account for either "Calls+Data" or "Data Only."
*Plans for foreign visitors to Japan (Japan SIM) are not eligible.
●Registered codes cannot be cancelled under any circumstances.
● If you are registering using the QR code on the card,
・The only plan available is "Data Only."
- Calls and SMS sending/receiving are not available.
・You cannot switch from another carrier (MNP).
- There is no need to submit identification documents or register a credit card or deferred payment (paidy) when signing the contract.
・Available only within Japan.
・Only eSIM is available.
・A separate line capable of making voice calls and receiving SMS is required.
・This event is for people aged 13 and over.
All procedures and support will be done online.
・It may not be usable on devices other than those that support povo2.0. Please check here to see if your device is compatible with povo2.0 or eSIM before purchasing. *1: QR Code is a registered trademark of DENSO WAVE.


