You can replace the SIM card yourself, which is necessary when switching carriers.
However, if you try to replace your SIM card without any preparation, you may encounter unexpected problems. We will introduce basic knowledge about SIM cards, how to replace them depending on the model, and the settings after the replacement. Please check these before replacing.

Before introducing how to replace a SIM card, we will explain some basic information, such as what a SIM card is and what types and sizes are available.
By gaining a better understanding of SIM cards, you can prevent problems such as damage due to improper handling or the SIM card sent by your new carrier not fitting.
A SIM card is a card that records the subscriber's information and is an abbreviation for "Subscriber Identity Module."
By linking the information on the SIM card with your phone number, you can make calls, send SMS, and use the Internet.
Simply put, it's good to remember that the SIM card contains all of the subscriber's personal information and contract plan.
When you switch carriers, your contract plan will naturally change as well, so you will need a new SIM card with the new carrier.
After signing up with a new carrier, simply insert the SIM card they send you into your device and the basic switching process will be complete.
However, it's important to note that there are different types and sizes of SIM cards, so you'll need to either get a SIM card that fits your device, or purchase a new device that fits the SIM card.
First, let's understand the type and size of SIM cards.
| SIM card types | Summary |
|---|---|
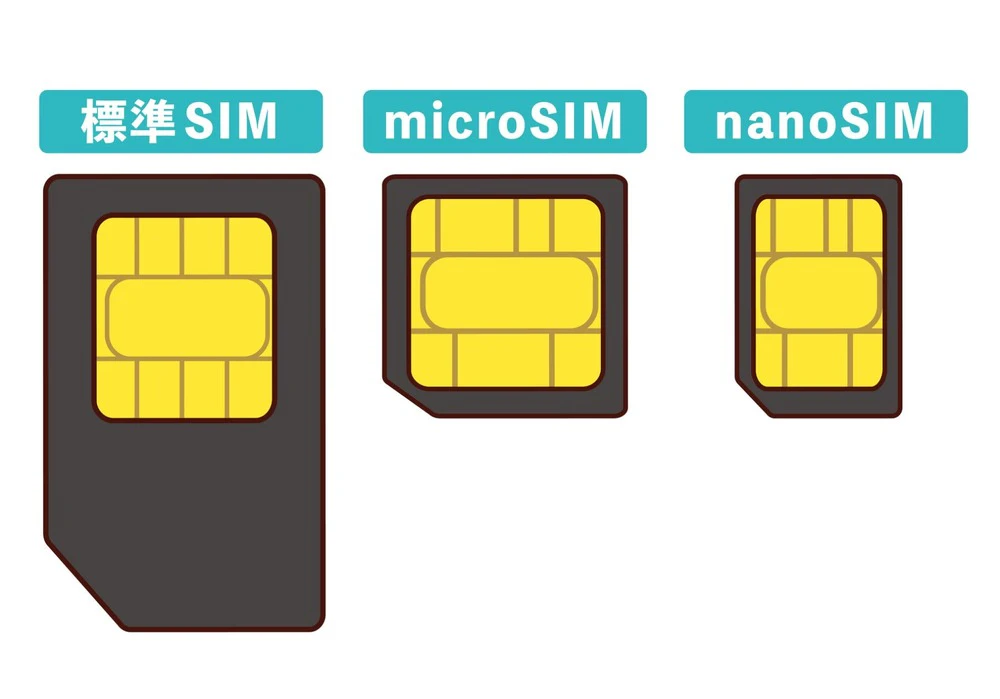
| Standard SIM | - Size: 25 x 15 mm, thickness: 0.76 mm ・It has been around since the early days of smartphones in Japan and is compatible with 3G generation devices. ・Currently, there are no models with standard SIM cards on the market. |
| microSIM | - Size: 15 x 12 mm, thickness: 0.76 mm ・Launched as the next generation standard SIM model ・They began to become popular around 2010, and can still be found on used smartphones and mobile phones. |
| nanoSIM | - Size: 12.3 x 8.8 mm, thickness: 0.67 mm ・It is the latest standard and most models currently on the market are nanoSIM |
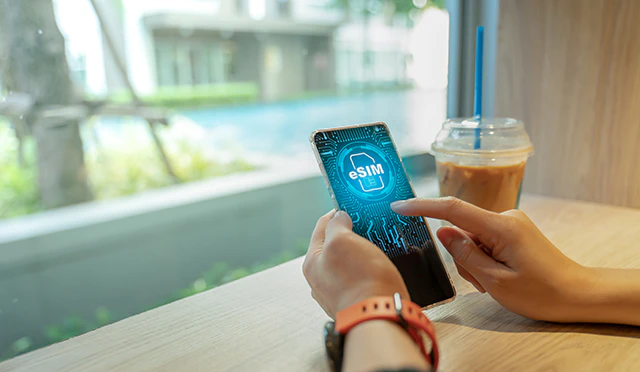
In addition to the SIM cards mentioned above, there is also the "eSIM (Embedded SIM)," a chip-type SIM that is embedded in the device.
If your device is eSIM-compatible, you don't even need to replace the SIM card; you can activate it simply by completing the online procedure.
If you don't want to worry any more about the type and size of SIM card, one option is to purchase an eSIM-compatible device and sign up with an eSIM-compatible carrier.
For example, au 's online-only brand (*1), povo2.0, allows you to complete the eSIM activation procedure entirely online. With an eSIM, you don't have to wait for the SIM card to arrive, and it can be activated as soon as the same day (*2).
If you find it troublesome to change SIM cards, please consider this option.
Reference: What are the sizes and types of SIM cards? Things to be aware of when changing the size!
*1: As this is an online-only plan, all procedures and support will be handled online. Please contact us via the povo2.0 app or official website.
*2: It may take some time depending on the application status.
When signing up with a new carrier, you need to pay attention to the type of SIM card that is compatible.
For example, if the carrier you plan to switch to requires a nanoSIM and your current device does not support nanoSIMs, you obviously cannot use it.
To avoid this kind of mistake, first visit the official website of the carrier you plan to switch to and check which models are compatible with their SIM cards (services).
You can also search for devices that have been confirmed to work with povo2.0 on the dedicated page (※3).
*3: Reference: "Compatible models and devices" (povo)
A SIM card is a component that stores contract information to identify the user, and in order to communicate or make calls, the information on the SIM card must be linked to a phone number.
In addition, data other than contract information is not stored on the SIM card, and data such as music and photos stored on the device will generally remain intact even if you replace the SIM card.
However, some Android devices store data on SD cards, and data stored on the device will not be transferred even if you change SIM cards, so be careful when changing models.

Prepare the device you want to replace and the SIM card itself. There are some points to note when preparing each, so please refer to the information below.
Insert the new SIM card and prepare the smartphone (device) you will be using.
If you plan to continue using your current smartphone, you will need to check whether the SIM card (service and size) provided by the carrier you plan to switch to is compatible with your model.
Also, if you are using a device you already own, you will need to check whether it is SIM-locked.
SIM lock is a state in which a device is locked so that it can only use communication services provided by a specific carrier.
For example, if the SIM is locked, you will not be able to use a SIM card from company B in a smartphone purchased from company A.
However, since SIM locking has the disadvantage of preventing users from freely choosing a carrier, SIM locking is now prohibited in principle for smartphones released after October 2021.
Be careful if you are using a smartphone purchased before September 2021.
You can find out if your device is SIM-locked by contacting the carrier you purchased it from, so be sure to check beforehand. (If you want to unlock the SIM, you may be charged a SIM unlocking fee.)
If you are replacing the card physically instead of using an eSIM, be sure to pay attention to the size of the SIM card.
As mentioned above, there are three sizes of SIM cards. For details, see "SIM Card Types and Sizes."
The size of the SIM card that can be inserted varies depending on the model, so make sure that it can be inserted into the smartphone you plan to use.
It is also important to choose a career and plan that suits you.
If you are currently using a major carrier, you may be able to reduce your fees by switching to a carrier (MVNO) that offers low-cost SIM cards and smartphones, or to an online-only brand such as povo2.0.
The method for replacing a SIM card differs between iPhone and Android.
We will introduce each method below, so please use them as a reference when replacing the SIM card. When replacing the SIM card, make sure to turn off the power, regardless of the model.
There is no direct relationship between removing the SIM card and the power supply.
However, the SIM card slot is a delicate circuit board, so if you replace the SIM card while the power is on, there is a very rare chance that reading problems may occur, so we do not recommend this for precision equipment in general.
Get into the habit of turning off the power not only when working with SIM cards but also when working with precision equipment.
The iPhone has a "SIM tray" that is dedicated to the SIM card.
To remove the SIM tray, use a paper clip or the pin that came with your iPhone to insert it into the small hole at the bottom of the tray. Be careful not to press too hard.
Remove the SIM card from the SIM tray and insert the new SIM card according to the mold.
Make sure the tray is facing the right way, then return it to its original position and swap it over to complete the process.
The location of the SIM tray varies depending on the iPhone model. Please refer to the official Apple website to check.(*4)
*4: Reference: "Removing/replacing your iPhone's SIM card" (Apple)
For Android, there are three main types, and the method for replacing each is as follows.
However, the location and removal method of the SIM card vary depending on the model, and the exact procedure for replacing the SIM card also varies. For detailed instructions, please check the manufacturer's official website.
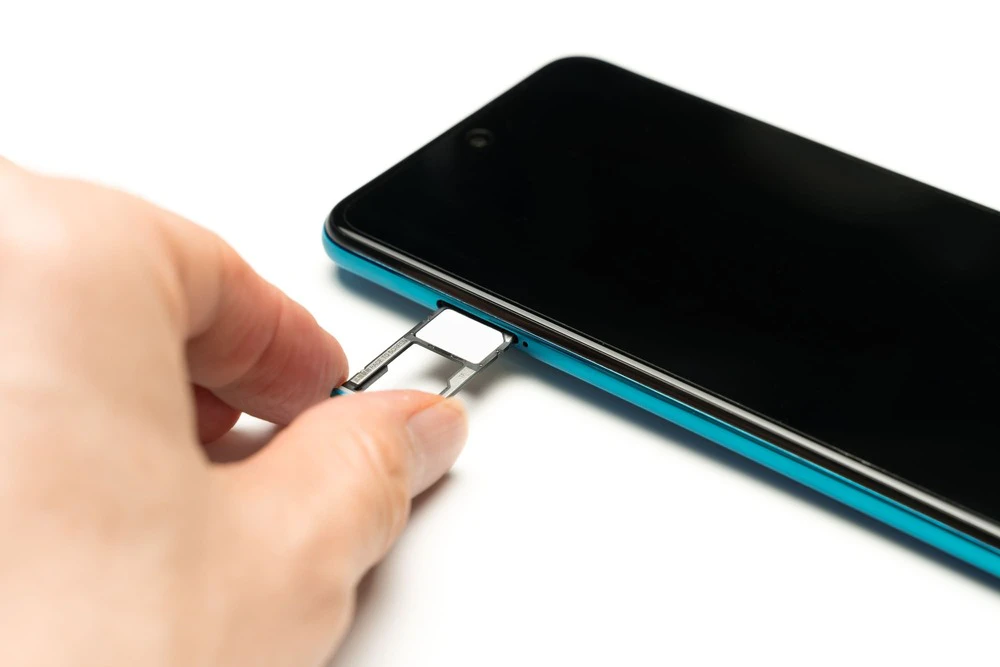
There is a hole on the side of the smartphone for inserting the SIM card eject pin.
Insert the pin or paper clip that came with the device straight into the hole and push it in, and the tray will pop up slightly.
Pull out the tray that comes out, remove the SIM card, and replace it with a new one.
Make sure the SIM card is properly seated, then return the tray to its original position to complete the replacement.
Use your fingernail to remove the cover, then pull out the tray inside and remove the SIM card.
Use the missing corner as a guide to fit the new SIM card into the tray, then insert the tray back into its original position and close the cap to complete the replacement.
First, remove the back cover, then remove the SIM card inserted in the slot underneath the cover.
Finally, insert the new SIM card all the way into the slot with the metal side facing down (towards the device) to complete the replacement.

The SIM card is a delicate precision component.
The IC part, which is made of metal, has a particularly delicate structure as it transmits information.
If the metal parts get oily or scratched, they may not work properly.
When replacing the SIM card, try to avoid touching any metal parts.
You also need to be careful about the orientation of the SIM card.
If you insert it in the wrong direction, it may malfunction or damage the SIM card.
Basically, a SIM card is a rectangle with one corner missing. If you use this as a guide to insert the card into the tray or slot, you will be able to insert it correctly.

To communicate with a new SIM card, initial setup is required. (*5) Below, we will explain how to set up your new SIM card after replacing it, separately for iPhone and Android.
Since you will be communicating over the Internet, connect to Wi-Fi before proceeding with the setup.
(1) Turn on your iPhone and enter your Apple ID and password.
(2) Check if the "iPhone has been activated" pop-up appears on the home screen.
(3) If the name of the carrier of the newly inserted SIM card is written in the upper left corner of the screen, the process is complete.
(1) Tap the Settings app (gear icon) at the bottom of the home screen
(2) Select "General" on the settings screen
(3) Tap the "VPN and Device Management" item on the General screen.
(4) If the name of your previous carrier is displayed, select that configuration profile.
(5) Tap "Delete Profile" at the bottom of the screen.
(6) If a passcode is required, enter it.
(7) Select "Delete" from the displayed items to complete
(1) Tap "APN Settings Configuration Profile" in Safari
(2) Select Allow to download configuration profile
(3) Tap the Settings app on the home screen
(4) On the settings screen, select the item that says "Profile downloaded."
(5) Tap "Install" in the upper right corner
(6) If a passcode is required, enter it.
(7) The profile description will be displayed, so select "Next"
(8) Tap "Install" in the upper right corner of the screen.
(9) Two options will be displayed. Select "Install."
(10) Tap "Done" in the upper right corner of the screen to complete the setup.
Let's try to see if we can communicate without Wi-Fi.
*Profile setting procedures may differ depending on the carrier and the iPhone you are using, so please check with the carrier you are considering switching to for details.
The procedure for Android varies depending on the model. We will only show an example here, so for detailed instructions, please refer to the manufacturer's official website or instruction manual.
(1) Open the Settings app
(2) Select "Wireless and Networks" on the settings screen
(3) Tap "Mobile Network" at the top of the screen.
(4) On the screen that appears, select "Access Point Names."
(5) Make sure the APN settings are for the carrier of the new SIM card. If not, select the carrier of your choice.
(6) Check if you can communicate without Wi-Fi and you're done
*5: Reference: "SIM card activation procedure" (povo)

In this article, we have explained the basics of SIM cards, the preparations you need to make before replacing them, and how to replace them and set up communication settings.
Replacing a SIM card is not that difficult as long as you pay attention to a few key points, such as the type and size, and checking which models the SIM card is compatible with on the carrier you are switching to.
However, some people may be concerned about handling SIM cards.
For such people, we recommend povo2.0, au 's online-only brand.
povo2.0 is also compatible with eSIM chips that are embedded in devices, and as long as you have an eSIM-compatible device, the activation process can be completed entirely online.
There is no need to go to a store or wait for the SIM card to arrive, so you can activate it as soon as the same day (※2), and because it is an embedded type, there is no need to worry about changing the SIM card.
Furthermore, povo2.0 is a fees plan with a basic fees of 0 yen (※6) (※7) (※8), where you can purchase Topping data as needed, so unlike the monthly plans that have traditionally been mainstream, you only fees for the amount of data you need.
For example, you can Topping such as "Unlimited data (※9) (24 hours) 330 yen/use" or "Data Top-up (7 days) 390 yen/use."
Also, when you are replacing your device, we recommend taking advantage of povo2.0 's Smartphone Gigatrade for your old smartphone.
Smartphone Gigatrade is a service that allows you to exchange your old smartphone or tablet for a 20GB (30 days) trade code that can be used on povo2.0, depending on the purchase price.
In addition, we are constantly updating the campaign list page with other great campaigns to take advantage of when changing carriers, so please take a look.
*2: It may take some time depending on the application status.
*6: Separate fees may apply. If you have not purchased any paid Topping validity 180 days or more, your service may be suspended or your contract may be terminated. Please be aware of this in advance.
If you sign up for five lines* under the same name, a contract administration fee of 3,850 yen (tax included included) per line will be charged for the sixth line and beyond.
*This includes lines that have been terminated or cancelled by our company within the past year.
7:Domestic calls are charged separately at tax included 22 yen/30 seconds, and SMS sending is charged separately at tax included 3.3 yen/text (up to 70 characters).
Depending on the model, a maximum of 670 two-byte characters can be sent; up to 134 characters are counted as two SMS messages, and thereafter one SMS message is charged for every 67 characters. Calls to satellite vessel phones are charged separately at tax included 177.1 yen/30 seconds.
Reference: povo2.0 Plan Details
*8: If you do not purchase a data Topping, the maximum sending and receiving speed will be 128kbps.
*9: Communication speeds may be limited during network congestion or when using video or cloud games.